Trees so far, made from air drying white modelling clay. Based on Bamboo tree.
Clay rolled up to the length of 9ft scaled down. Was going to do it to the scale on average of a real tree but these would look too huge.
Tree with two extra layers on to make look more realistic. This clay wasn't very good to work with, kept crumbling, then when using water got too soggy. But i persisted with it .
Once they had been sanded down using sand paper, the clay work quite well and the trees became extremly smoother.
Monday, 17 January 2011
Stage Model
My black stage model to 1:25 scale.
I Decided to do the basic stage model of Margate theatre, just from the front stage/arch line. As i felt this is all that was needed to be shown and fit my stage design/ props in. The boxes on the edges at front and under stage did not need to be shown .
my final black model.
Wednesday, 15 December 2010
Researching on the internet, scenographic set model boxes. I found some really great ones which could be a good influence. In terms of colour these picture show moods very well.
Blue and Green.
Examples of white set model boxes, helps me with the initial idea of how small or big things should be in comparison to size/scale.
This model box is much like how mine will be in the sense of being simple. Geometric shapes and muted colours (bland).
These two are good influences for trees. I like how one of them the trees are upside down, gives great mysteriousness and fantasy to it.
The second picture also excites me, its very simple with few trees, (simple being the outlined trees with black a clear cylinder)but very viney. Too viney for my model box.
Struggling with wolf ideas: i have a image in my mind of what i want him to look like, but finding it hard to get the design down on paper. Obviously using cubism as a genre i still have to keep him to simple geometric shapes, but also want him to be recognisable as a wolf. Need him to be grey with bright red evil eyes and a nasty but cheeky grin about his face. Any ideas?
Looking at these: Cartoon for simple shapes.
Tuesday, 14 December 2010
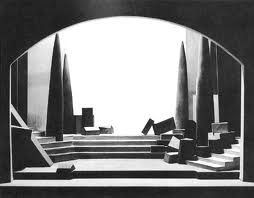
New change of ideas.
Using Nutcracker as an influence in costume design and colours to show intentions, moods and feelings.
As in the Nutcracker ,whit and gold are used to show innocence and happiness hen they dance together, looking on to my scene i was thinking of keeping the same cubism shapes, but toneing down on the colours to show moods, intention and feelings more clearly but still fitting in with cubism as the colours for cubism were always very muted anyway.
RED CAP
She will be dressed in white, with only a red cape and red long tights and ballet slippers, with a large tutu. (just as in Nutcracker) props: white basket. The white is to show the innocence and purity of her, red cap to show who/ her status.
WOLF
In very dark grey, and bright red eyes to show evilness, but with a great big teethy smile. (tricking red cap)
Flower and trees: will be white with a touch of gold, showing pure nature.
Gold/yellow light to shine when wolf states "look how beautiful the forest is" to lead red cap off the path.
Path and background will be grey to show depth and darkness of the forest.
When Red cap and Wolf are chatting A white light will shine on the both of them.
Working with foam board: making sides / edges neat without any foam showing.
A 90 degree angle.
First, using a engineer square and a sharp cutting knife, practise cutting straight lines, using the excess strips cut off, cut 2 squares. On 1 square made a cut but not all the way through, just enough, so i could scrape off the foam, leaving the card attached. Glued the other square on. Now i have neat edge. (as so) Mine did go a bit dodgy, lucky it were a test!
Can stil see foam on the surrounding edges: to cover the surrounding edges, using cartridge paper cut some strips the same with as edge, then simply glued on, cutting angles where needed.
Thursday, 2 December 2010
Subscribe to:
Posts (Atom)